Saturday 8 May 2021

 The Floating World


It was about this point I started looking quite deeply into the concept of the floating world or ukiyo that brought about ukiyo-e printing and it was only after reading several different journalistic accounts and takes on it that I realised, the floating world is something very open to interpretation and quite possibly something that each of us carries uniquely.

"During Japan’s Edo period (1615–1868) the phrase "the floating world" (ukiyo) evoked an imagined universe of wit, stylishness, and extravagance—with overtones of naughtiness, hedonism, and transgression. Implicit was a contrast to the humdrum of everyday obligation."

This description of the floating world seemed most fitting to me, as others were trying to claim it was specifically the edo region had to be pictured or that it must include a specific set of iconography to be considered ukiyo-e. I think that's probably not the case and instead was closer to what is described above. Ukiyo-e images reflected a certain characteristic, they had a shared personality that can be read in the quote above.


 Artists


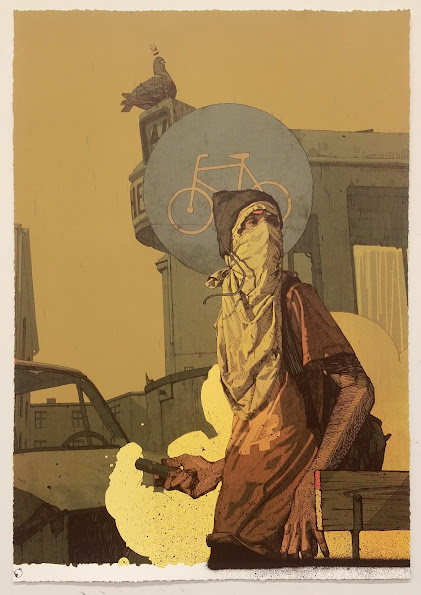
I'll take this opportunity to discuss and explain the direction I was taking these prints in further. I wasn't really up for any more research through this Unit as I had done all that in the previous Units but a little bit of surfing mainly to remind me of artists whose work had interested me before...


POSE


SAINER


ENDI


Adding Things to the Scene


To add anything to these scenes physically, I was faced with a challenge, I would have to be able to draw them in the correct perspective to the rest of the scene although this perspective 'point' didn't really exist, it wasn't something I could easily return to...

But I did try, I had visions of plastering the wall in the big print with 'The Streets' gig posters and Frankie Boyles 'tramadol Nights' event posters, so in order to think about it, I wanted to know how to do it...


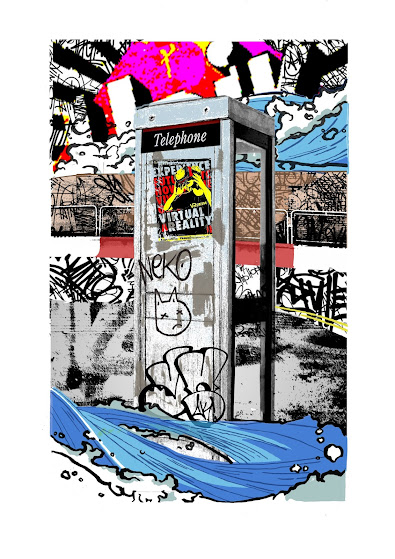
So in order to have them in the correct perspective I would have to set the model and camera up in the same places. I did this and then printed the posters out at the correct size for the scale model, drew three rectangles the same size as the phone box on a sheet of paper (below) and stuck my poster on the rectangle where I'd like it on the phone box, I then cut the rectangles out and attached them to the phone box.
These steps were necessary as, if I had just stuck the poster to the model itself I would never have been able to seperate and split the colours of the poster digitally from not being able to fully remove it from the surrounding image.


In the end once I had all seperations made and coloured digitally I organised them in the correct registration on the back of the phone box in Photoshop, decided I didn't like it and flipped the entire thing horizontally.

Ultimately this poster did not make the cut nor did any of the others but glad I know how to do it.


 2 New Prints


Having chosen to add in and edit the two designs from the previous unit, I took a break from the large print as I felt I was struggling with what to do with it. So started making changes the two new ones as seen previously. 

I then started to make alterations further, bringing them forward to be print ready.


As shown before above was the new base I was happy to start with.

I then thought a crafty thing to do, would be to fill at least some of this fictional space with imagery that hinted at the inspiration for the idea. So I placed a poster on the rear of the phone box the technical challenge of which alone was fairly big and I found a book jacket that belonged to a favourite of mine by Phillip K Dick, in which the protagonist is stuck in a fictional landscape at the control of someone who has influence over this fictional physical space.


To begin with I really liked both of these editions, neither made it to the final cut but the ubik cover was very helpful in that it led to the backdrop idea of my three prints.


Friday 7 May 2021

 The Big Print


The print I started with was the biggest of the three, I planned originally to make this print at A1 and then break it down into three segments to almost create a print triptich...

This figure was drawn from a drawing and was therefore not mine, I did change it later though and recreate the character in my own hand. He an be seen sitting on top of a grassy mound too (more clearly visible in the image below), this too was inspired by the work of another that actually was a great aid in this series of prints to refer too.. more on him in a bit.

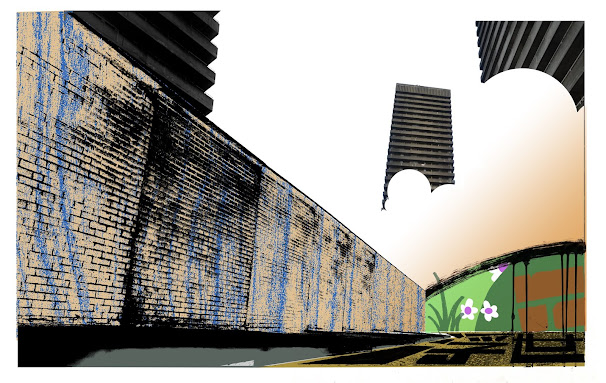
I do feel as well, that at this stage I should explain the buildings. All three prints use the same buildings in them, I chose them for a few reasons, the photos were good, the buildings quite dystopian which played into the style I was going for and the research I had done and lastly and most importantly: because these were two high rises that towered above any other in Glasgow and were known by the general population of the city for years as a complete eyesore, they were built at the end of the sixties to sort out the astonishingly bad slum tenement conditions that had become the worst in Britain and ever since first seeing them I've been in love with their Brutalist design and the frightfully imposing nature they projected on to the surrounding area. These towers were pitched as 'mansions in the sky', were exceptionally forward thinking at the time of their construction but really upsettingly, the powers of the general population won in the end and the 'Gallowgate Twins' were demolished in 2016. I can't save these buildings but I can immortalize them and then maybe, show an audience how I saw these giants.


I built this image up and it was around this stage after colouring the whole frame that I realised that this would not scan  when split into three, the boxes were present in the document from the beginning, dividing the image and I believed that each of these sections at this stage, would not be interesting enough to become their own seperate prints and whilst I thought I could just spend the rest of the time I had working on this adding detail up to the hilt, I moved away from the triptich idea and introduced the two images already seen in the blog.

The different colours in the skies were created by using the cloudscapes I made for the slides in the last unit.


 New Bases


I now had a new starting composition for the two previously shown prints and for one new one...


This photo, ore one of the dozens almost identical to it were used...


To be added to another self created wall section to make this new base...


For the next composition, I was aware that the homemade forced perspective tactic was of little use as I intended for the 'camera' to be seen as if it were raised high above ground level and so had slightly freer reign as it meant only the Utility pole model would set the perspective, meaning I could create almost any perspective.

This didn't exactly make it simpler, I faffed about getting something I liked for too long.


Took me a while but after piecing together my favourite parts I had something I was happy with..


You will have to imagine this without the kanji and black lines in the sky as this is the most under developed version I have.


This was the new composition I had created myself. This came first and was actually quite heavily developed before either of the other two came along but was eventually scaled back in its grandness to allow for the other two to be made, as what I was originally trying with this became to much for the time limit, more on that next...


 Where to Begin


The first thing I did when I got back to Manchester was set up a photobooth in my room for the models. I did this for a couple of reasons, I had found it very hard to get a high quality photo of the models otherwise, when backlit the front of the model would be unrefined or in darkness and when lit from the front any of the diny details I had worked so hard on were erased by the brightness. By creating a white backing and allowing natural light to reflect around the model I got everything I wanted from the photos...

The other reason and perhaps the slightly wilder one was in order to allow me to build my own scenes using the models. I'll tr to explain what I was doing as best I can..


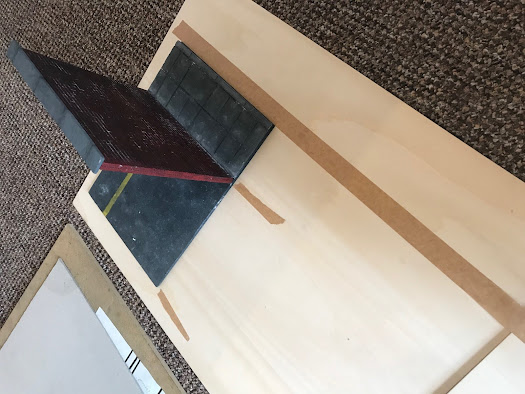
This is the 'booth', some foamboard taped together on top of a glass panel, all resting on an upturned laundry basket. In front of these and rather crucial to the whole process are two stacks of books.

One of these stacks was used to rest a sheet of white styrene over the top of, to simulate a slight incline for the models to be photographed on. The other, taller stack, was used to rest my camera on, this camera stack would then be moved around the perimeter of the 'booth', with books being taken out or added in where necessary.

This may seem like strenuous lengths to go to just for photos of the models I already had, as seen in the previous units work but these lenghts were needed as it meant I could reconstruct the basic composition of the two images from the previous unit as I wanted them, using my models for the structures where I could....


I guess I was a little annoyed when, after a whole year of finding new ways of creating space I was back to linear perspective. Though not quite...

In the photo above can be seen a lot of framers tape stuck down in long lines and small squares as if marking something... well these are the directions in which the wall section that I built would slowly be moved along bit by bit, taking a photo at each stage to only then sew together each photograph in photoshop, to make 1 connecting wall, only from the same piece of wall, multiplied 5 times over. These directional marks also allowed me to, when finished photographing the wall, remove it and place in the other models where I wanted them in correspondence to the complete (sewn) wall, also the models would this way, diminish into the background at the same rate, I basically had created a very rough way of delivering forced perspective. Through moving the book stack, raising or lowering it and keeping note of the direction and position of the camera and the model at all times I was able to construct my own basic scenery digitally post photographs.

I suppose this might be a bit tricky in writing, so will try to give some aid in images..


These three photos show the wall sections at their different points down the tapeline. Each of these photos were then uploaded and edited to have everything surrounding them removed digitally (hence the white background), the camera stayed at the same place for each of these photos and they would be turned into..


Then.. using the same directional mark that was used to register these wall sections I would then place the models at the correct points along it, to then drop them in to the image above...


I quickly realised that to be in anyway convincing that the exposure and light intensity settings on the camera would have to be changed with every photo I took so as to make the scene appear real by giving it true light values, also if I didnt do this and each photo was properly well exposed you would notice that it was the same wall section, I did find all this out the long way but don't appear to have saved the duds. 
These camera settings had to be taken note of as when I came to swap out the models from wall to, e.g. dumpster, I had to know what the camera settings were for the wall section when photographed that close to the camera so as to have them match when placed on top of one another digitally. 

I could have maybe taken the photo together with the dumpster on the wall section model as it does come attached with pavement and road but this would have produced shade from the model dumpster, which would project on to the wall behind and whilst this adds realism it meant I would be stuck with the shade in the resulting keyblock (black), when I want shade I'll put it in myself through use of colour blocks.


I did a couple of these before I was happy and ended up coming back to it later anyway but this is how I achieved the inclusion of my models in a fictional scene.

I will say, this was not easy and very time consuming, hundreds of photos later and a lot of tedious editing, to produce an image in which no more than 8 images are connected to one another, this process will require refining in the future.

...I have been informed that this is maybe a little tricky to understand as is. So I tried to take some more photos to clear it up a bit...


Directional mark for the wall to run in, marked with tape...


marks made to show where the pavement extends to out the front and where the car park section should extend to behind...


Here the wall has moved along one place and new registration marks have been put down..


Once this had been done 5 or 6 times, I would have had enough images of the wall to sew them together, so I remove the wall section entirely to be left with only registration marks...


Now the phone box is placed in between the registration marks for the pavement of the wall section, to then be dropped in on top of the wall...

from the example shots above taken on my phone this is the images the camera took..

These are the sections of each photo I want removed...


and this is them joined. The phone box was taken at the same distance to the camera as it was to sit on top of the pavement, this wasn't the case for my prints, they were a lot more challenging.




 Where I Started


Now with the ground work set, I had to plan to start printing but new there was still work to do to any of the images before I was print happy. So I chose my favourite bases from which to work that I had created in the previous unit. I did this and began building one image from scratch but more on that later...


These were the two images I was happiest with the basic composition of from all the work on my previous unit. That said, there was still changes that required to be made and quite a lot to both of them. For starters, there was no utility pole in the second image. 

So, I knew I wanted something similar to these but essentially totally different, I had work to do but was finally back in Manchester, giving me the space I needed to do what it was I had imagined weeks before...