Tuesday, 26 January 2021

 Where do Prints Come in?


At this point it is reasonable to wonder at which point my media of print enters into things. As print is merely the media in which I hope to display these miniatures I have left worrying about that until I need to. I have kept up with the designing of new prints and currently have the blocks cut for another and am in the process of ordering more woodblock, for another two prints.

With these prints I hope to conclude my research into how 3-dimenional space can be displayed in print. I then intend to use the miniatures not just to display the degradation of urban space (which I'm currently thinking of doing through a sequence of consecutive photography, showing each miniature slowly degrading), I also plan to use the photographs I take in a further series of prints that show the miniature degraded inside an urban space that I have drawn myself, presented in the fashion of foreground/background like space was in my 'Waka' prints.

As this is my goal, I may only get mock-ups created in time for the assessment, leaving the actual print work to carry me smoothly into Unit X. We'll see how it goes though...

 Phone Box Construction


I started with the backplate for the phone box and the extrusions that would essentially become the four posts that supported it. Then onto the top box.


Next I tackled the light that is in the ceiling of the phone boxes. This proved tricky as I couldn't find any clear reference photos of the ceiling and due to lockdown couldn't really travel too much just to find a phone box to photograph, this wasn't to bad a situation though as I did start this unit trying to move away from relying on photos of the real world and focuse more on having full personal control of the spaces. I slightly winged it.


It wasn't easy but i managed to give the light a 1mm rib as I seem to remember alot of lights like this having one.


This was pretty complex stuff. The main body and most of the elements I made from 0.25, 0.5 or 1mm styrene sheet. The light I needed to be clear so use an empty packet of plastic that previously housed some sliced ham, (washed it first of course) it wasnt the most pliable or easy to work with.


In the end, after a lot of wrestling and several failed attempts I had something I was happy with.


The gummed, tacky effect of the casing was the easiest part to achieve. After removing the label from the packet of ham there was a glue residue that created the perfect effect. However, the adhesive qulity was impossible to be rid of entirely so that made it a lot harder to work with as it kept wanting to stick to both me and the scalpel.


The actually light bars were created by chopping up some cotton buds and placing them inside a box casing which were then fixed to the reverse side of the ceiling platform.


Next came the side panels which were constructed out of layers of styrene and an acetate sheet running through the middle of them. After this I began making the small elements that are found on the solid wall of the phone boxes e.g. elcctronics box at base, poster frames, shelf for phonebook. None of these things were glued down yet as I plan to paint them separately before putting it all together, all this is glued in this photo is the backboard and top box.


Another angle.


And again, another angle.


Reverse side, with space for the telephone sign. The core of the backplate was made from cardboard.


Front side. Again, the two front extrusions were not glued for this photo.


Side panel no. 1.


All following photos are of the receiver.


Phone and holder.


For an idea of scale.


Side angle, (phone not glued)


At this stage the only things left to make are the wire connecting the phone to its holder which I plan to make out of a guitar string and if i can find something suitable then the tread plate textured backboard to the main stanchion.

Other than that the construction of the phone box is completed.

I was going to jump on to painting it right away but I'm enjoying construction and don't see the point of jumping from construction, to painting, to construction again and again so, I'm just going to move on to constructing the next miniature... 


 Beginning Construction


 I wanted to show degraded urban space through socially conscious imagery that used the compositional format I had learned about through Japanese print, implementing the use of constructed models. 

For this to be achieved, I needed to select objects/structures to build that could be related to and understood by a wide viewership.


My first thought and one I was really quite happy with, was, to me, a perfect example of a bygone era and a structure that as such has been left to ruin, the phone box. 

I researched it and the second link is to a PDF that gave me the exact specifications for the dimensions of the structure, which I then proceeded to make in 1/12 scale. 


 Good Films


 Planning for Scale Model


After researching miniature art and artists, I began planning for one of my own. 

As I was intending to photograph what I made and use the images to create prints from, I thought it would be best to create a model that would supply several possible images and angles that each could be used to create a different print (e.g. Looking through a window or door, down  flight of stairs, up at a half wrecked room, each supplying different textures and materials to colour.)


These are the slightly more developed but still rough technical drawings of the wall section I drew up featured below. This is only one part of the wall however, the part I decided would be made largely out of wood that would fit in to the rest of it. I was aiming for a distraught section of wooden housing that could supply me with photographs from several points (as mentioned above). 


This was the image I started with, I had a photo saved on my Instagram that showed a very dilapidated block of houses surrounded by swish high rises. This juxtapose really interested me and I was sure I'd be able to use it at some point. I put together a quick sketch of the flats described (on left), from this I took a section of the building and edited it, adding elements and taking away as I saw fit to create a rough of the section of wall I planned to build.


Once I got into the more analytical breakdown of the sections I required to build this model I realised that the timescale was going to be pretty tight, (at the point these images were drawn I had 4 1/2 weeks to assesment) I felt I could have finished the build in the time I had but with little time to do anything with it. I decided then to alter my plans slightly as the entire point of this was not just to better understand methods of displaying space in 2-dimensions but also to print it in 2-dimensions, I didn't have the time and needed a new plan of attack...


Thursday, 21 January 2021

 Artist Research


Artist David Smith, nice dilapidated futuristic building, that's how I see at least.


Artist Derrick Lin, @marsder on Instagram, creates some of the most interesting dioramas of any I found. I instantly was awestruck by these images, well before realising how he had achieved these and what they were made from. Lin attempts to capture the anxiety and stress of adhoc agency life, a lifestyle that he lived for many years, through the use of everyday items to those working in offices. To give an idea of scale he regularly places a pencil somewhere in the scene but most amazingly all of the structures, pavements and objects are made from simply piling jotters, textbooks, folders and cardboard boxes. A perfect example and combination of intent through material. really like this work


Artist Randy Hage, it was from these photos found on the website colossal, which I really enjoy the name of, which focuses on miniature and scale model artists that I thought building a section of wall would suit my needs as much as an entire structure would.


Artist Joshua Smith, A New York city building that he passes a lot on his way to the nearby subway remade in, I think, 1/35 scale


Artist Simon Laveuve, He tries to capture scenes of a post apocalyptic nature and the structures that may be found in such a setting. Extremely impressive and intricate work.


Artist Lori Nix and Kathleen Gerber, this artist duo I focused on in my essay so won't go on at length for but there interest in similar spaces as the focus I am dialing down into makes them a perfect source.


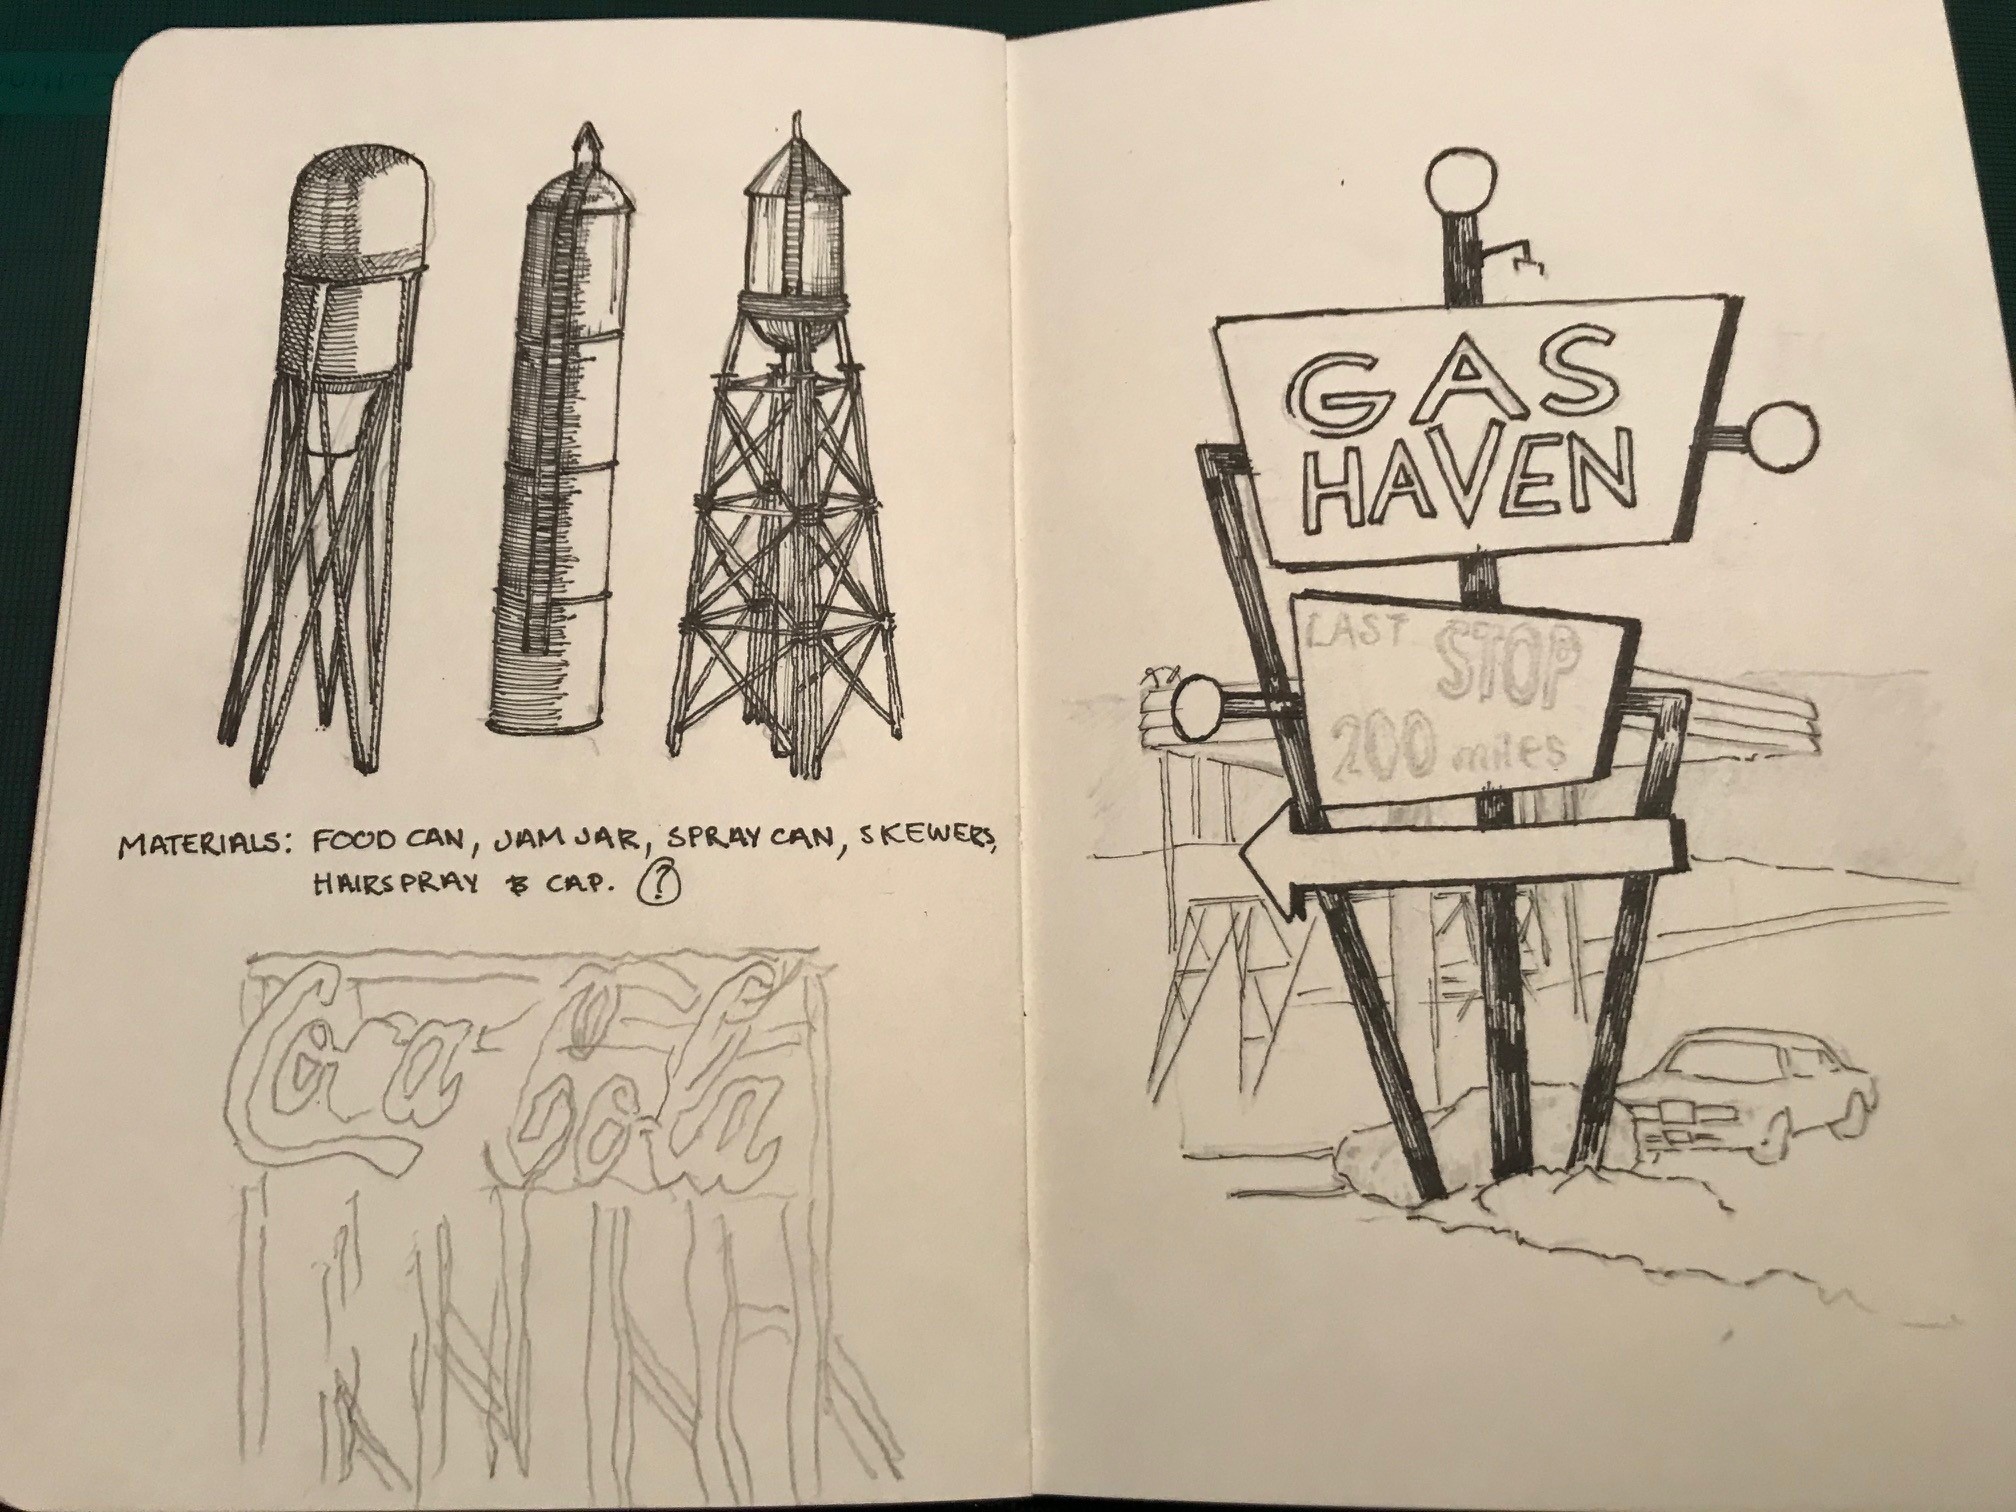
 Sketch Work


I always loved those posters from the 20's-50's that were advertising a location and thought maybe I could do something similar, picturing a beautiful vista or beach scene with the car in the foreground but having the whole image show obvious signs of disuse and degradation.


I started looking for miniatures and dioramas that imagined similar settings and what other people had thought these futures would look like and drew from them.


Always having had a fascination with abandoned spaces, which has cropped up before in university projects, I looked through old photos of my own I had taken while rummaging through forgotten buildings. I feel no space looks totally derelict without graffiti, this is basic but I feel sometimes it should be, not everyone can does, can.


Started looking at wall sections, as building an entire 4 walled structure with all the detail in this timeframe will be tricky.


(This is where my scanner gave up on me, only photos from here) More wall sections.


Started thinking about what objects could be made/drawn into a background. (Cloud scapes and Telephone pole)


Look at degradation in actual buildings as well as miniature ones.


Something has always spooked me about telephone boxes, grown up in the years they had just started to become obsolete, to me, they are a constant reminder of life before modern technology and the state of disrepair most of them now stand in just goes to show what happens to spaces without regular upkeep. 


Thinking similarly to the telephone boxes, what other signs would tell you, that you had left todays world and entered a derlict one? coca-cola sign in bad shape, petrol station unused and water towers half wrecked?...

With this and a lot more sketch work completed, I felt it was time to start designing my own space and thinking about how to make it...


Sunday, 27 December 2020

                                                        Onto the next thing


  With this series of waka prints completed I'm more than ready to move on to the next thing. So will now be delving back into the idea of diorama/model building to further develop my own sense of 3-dimensional space and how to display it in 2-dimensions.

                                                                Waka Prints


   Once the paper from Awagami arrived a couple of days later, I cut tem to size and dampened them to print the next day and after several consecutive days of printing I had 3 editions of prints I was extremely happy with.


These were the resulting represses of the two previously shown prints. The difference is certainly most clear in the second 'Waka 2', with the range and intensity of colour being so much more dramatic and that achieved with onky 3 layers of colour as opposed to 4, as well as the red of the sail being so much more vibrant than that of the previous in which the red faded almost completely, which was a problem as I had chosen it as the focal point of this print.


This is the third print which I printed only after learning what I did from the previous mistakes.


And this is how the pint was sent out. Each one has it's own poem card as each of the images were drawn up as previously explained in the blog from a separate waka poem, these cards came in two versions, the English text and Japanese script and on top of this they were mounted in a simple paper frame that had a description of the work on the back that read:

'The Waka series of woodblock prints from Kitchen Porter Press illustrates waka poems that describe the unique sense of space brought to Japanese print through such beautiful short-form poetry.'